A Comprehensive Guide To Set Up Canon Pixma MX490
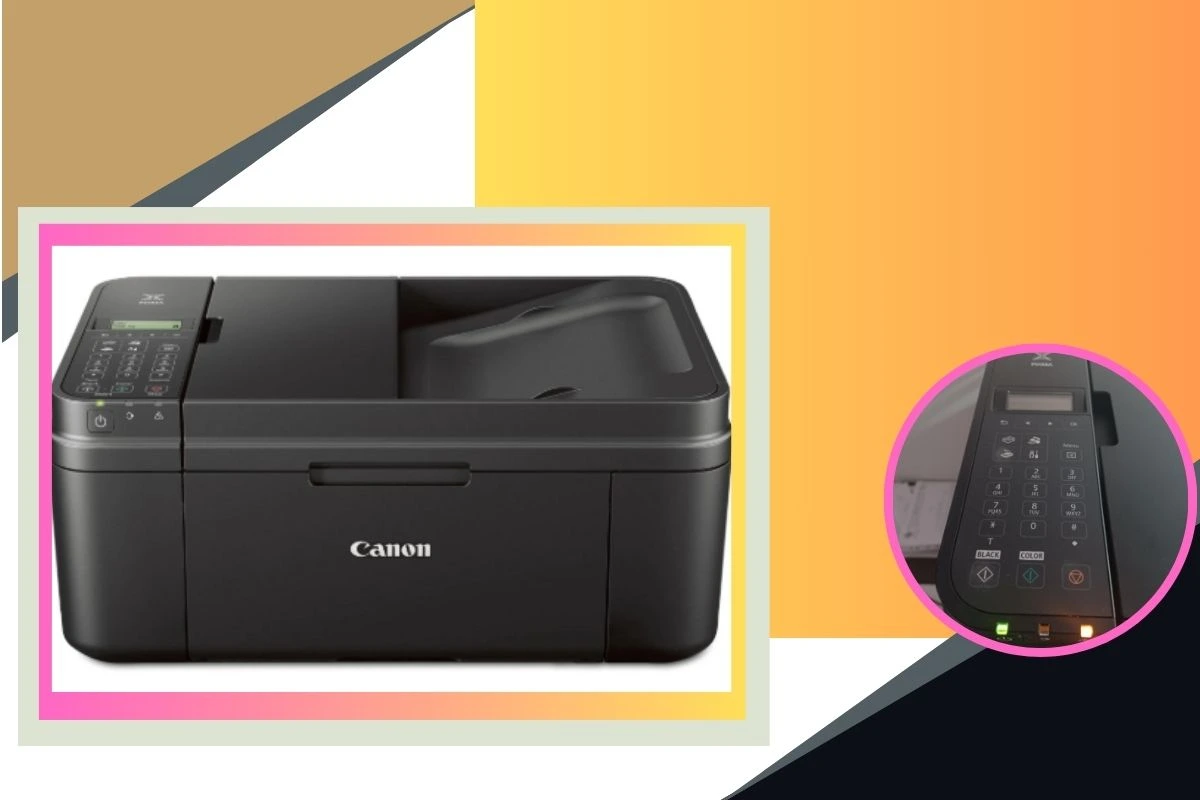
At present, a range of printers are available. Among all printers, there is Set Up Canon PIXMA MX490, a versatile all-in-one printer. It is supportive of printing, scanning, copying, and faxing. In the presence of the wireless connection, being a user, you can print from various devices. It includes computers, smartphones, and tablets.
Do you want to ensure seamless operation? If yes, it is better for you to set up Canon Pixma MX490. You are lucky to be here. After exploring this guide, you can enjoy the high-end features of your device. This way, you can enjoy the step-by-step approach to set up the Canon PIXMA MX490.
Let’s go ahead and walk through this guide to connect the devices, both with a wired connection or wireless…..
How To Set Up Canon Pixma MX490
In this section, we have mentioned the key procedure for setting up your Canon Pixma MX490. So, without much delay, you need to move forward, kick-start the process. Let’s go ahead……
Unboxing and Initial Setup
Step1: Unboxing the Printer
- Initially, carefully unbox the Canon PIXMA MX490 printer.
- Now, remove all protective materials. It includes tapes and plastic covers.
After that, ensure that the following components are inside the box:
- Canon PIXMA MX490 printer
- Power cord
- Ink cartridges (Black and Color)
- Installation CD (for Windows users)
- User manual and warranty card
Step2: Connecting the Power and Turning On
- Plug the power cord into the back of the printer.
- Then, connect it to a power outlet.
- After that, press the Power button so that you can turn on the printer.
- Finally, wait until the printer initializes.
Step3: Installing the Ink Cartridges
- In the first step, open the cartridge access door.
- Now, you need to wait for the cartridge holder so that you can move to the center.
- After that, unpack the ink cartridges.
- Thereafter, remove the protective tape.
- Next, insert the Black ink cartridge into the right slot. After that, you need to insert the Color ink cartridge into the left slot.
- Later on, push the cartridges in until they click into place.
- In the last step, close the cartridge access door.
Step4: Loading Paper
- First of all, open the paper tray at the rear of the printer.
- Then, adjust the paper guides so that it becomes easy for you to fit the paper size.
- After some time, load a stack of plain A4 or letter-size paper.
- Finally, close the tray and extend the output support.
Connecting Canon PIXMA MX490 to a Computer
Method 1: Connecting via USB Cable (Wired Setup)
Do you prefer a direct connection? If yes, you can follow the steps mentioned below –
- Initially, insert one end of the USB cable into the printer. Later on, insert the other end into your computer.
- In the next step, turn on the printer and computer.
- After that, insert the installation CD into your computer. Apart from that, you can also download the drivers from the official Canon website.
- Now, follow the on-screen instructions so that you can install the printer driver.
- Thereafter, select USB Connection when prompted.
- Finally, it’s time to complete the installation and print a test page. This way, you can confirm the setup.
Method 2: Connecting Canon PIXMA MX490 to Wi-Fi (Wireless Setup)
Option 1: WPS (Wi-Fi Protected Setup) Method
- First of all, you need to ensure that your Wi-Fi router is supportive of WPS and is powered on.
- In the next step, press the Wi-Fi button on the printer. You have to hold this button until the Wi-Fi light starts flashing.
- After that, press the WPS button on your router within 2 minutes.
- Later on, wait for the printer to connect. You have to wait until the Wi-Fi light becomes stable.
- Last but not least, print a Network Configuration Page so that you can confirm a successful connection.
Option2: Standard Wireless Setup (Without WPS)
- Now, press the Setup button on the printer.
- In the next step, navigate to Wireless LAN Setup and press OK.
- Then, select Standard Setup and press OK.
- Thereafter, choose your Wi-Fi network (SSID) and enter the password. For this, you have to use the numeric keypad.
- In this step, you have to press OK to confirm.
- At the end, wait for the connection to be established. { This way, the Wi-Fi light will become stable.
Option 3: Connecting via Canon PRINT Inkjet/SELPHY App
- In the first step, download the Canon PRINT Inkjet/SELPHY app from Google Play Store or Apple App Store.
- Now, open the app and tap Add Printer.
- In the next step, select Register Printer > Connect via Wireless Router.
- Finally, follow the on-screen instructions so that you can connect the printer to Wi-Fi.
- Last but not least, once connected, print a test page so that you can confirm the setup.
Installing Printer Drivers on a Computer
For Windows:
- At the beginning of the installation procedure, you need to go to the official Canon website.
- In the next step, download the latest Canon PIXMA MX490 driver.
- After that, run the setup file.
- Now, it’s time to follow the on-screen instructions.
- Thereafter, select the connection method (USB or Wireless).
- In the last step, complete the installation and set the printer as default.
For macOS:
- In the very first step, open System Preferences > Printers & Scanners.
- In the next step, click + to add a new printer.
- Then, select Canon PIXMA MX490 from the list.
- Finally, install the required drivers and confirm the setup.
- Setting Up Canon PIXMA MX490 for Mobile Printing
Printing from an iPhone/iPad (AirPrint)
- In this case, you need to ensure that your printer and iPhone/iPad are connected to the same Wi-Fi network.
- Now, open the document or photo you want to print.
- After that, tap the Share button and choose Print.
- Then, choose Canon PIXMA MX490 as the printer.
- Lastly, adjust settings and tap Print.
Printing from Android (Google Cloud Print or Mopria Print Service)
- Initially, download and install the Canon PRINT Inkjet/SELPHY app.
- In the next step, open the app and connect to the printer.
- Now, open the document and tap Print.
- Then, select the Canon PIXMA MX490 and print.
Troubleshooting Common Setup Issues
Have you been encountering issues while setting up your Canon PIXMA MX490? If yes, you need to delve into this section. After digging a little deeper into this post, you can be aware of the reliable tips for the same. Let’s have an in-depth insight into the steps mentioned below –
- At the beginning of the troubleshooting procedure, you need to restart the router and printer.
- Now, ensure you have entered the correct Wi-Fi password.
- In the next step, move the printer closer to the router.
- After that, reset the printer’s network settings and try again.
- Thereafter, check the USB cable connection. You have to do it if you are using a wired connection.
- In this step, ensure the drivers are correctly installed.
- You can kick-start the process for restarting both the printer and computer.
- Now, it’s the right time to run the print head cleaning function via printer settings.
- Next, ensure that ink cartridges are properly installed.
- Last but not least, use high-quality paper and genuine Canon ink.
Conclusion
Undoubtedly, setting up the Canon PIXMA MX490 is a completely straightforward process. No matter, you can choose a wired or wireless connection. By following this guide, you can confirm a smooth installation and enjoy seamless printing from multiple devices.
In case you encounter any kind of issues, you can refer to the troubleshooting section. Or you can also visit Canon’s support page for more help. With this guide, you can now successfully setup Canon Pixma MX490. Apart from that, you can also operate your printer for all your printing requirements.


