Canon Printer Setup
Introduction
Do you need to connect your Canon printer to your computer device? If so, this comprehensive guide covers all the aspects you need to know to kick-start the Canon printer setup and configuration process. No matter if you are using Windows or Mac, setting up your home printer or office network printer. We have established a platform to help you to be aware of all the steps involved in the process.
Wanna confirm the successful printer connection and operation? If yes, you have landed on the right platform. Undoubtedly, setting up a printer may seem daunting to you. But, it is damn sure that with the help of the right steps, it may be a breeze. Have you purchased an inkjet, laser, or even a 3D printer? This step-by-step guide will help you initiate the process.
Are you looking for a top-notch printer that will not break the bank? Your search ends here. Once you delve into the key details mentioned below, you will know how the high-end ink cartridges of a budget-friendly printer confirm qualitative prints all the time.
Let’s have an all-seeing eye on the information given below –
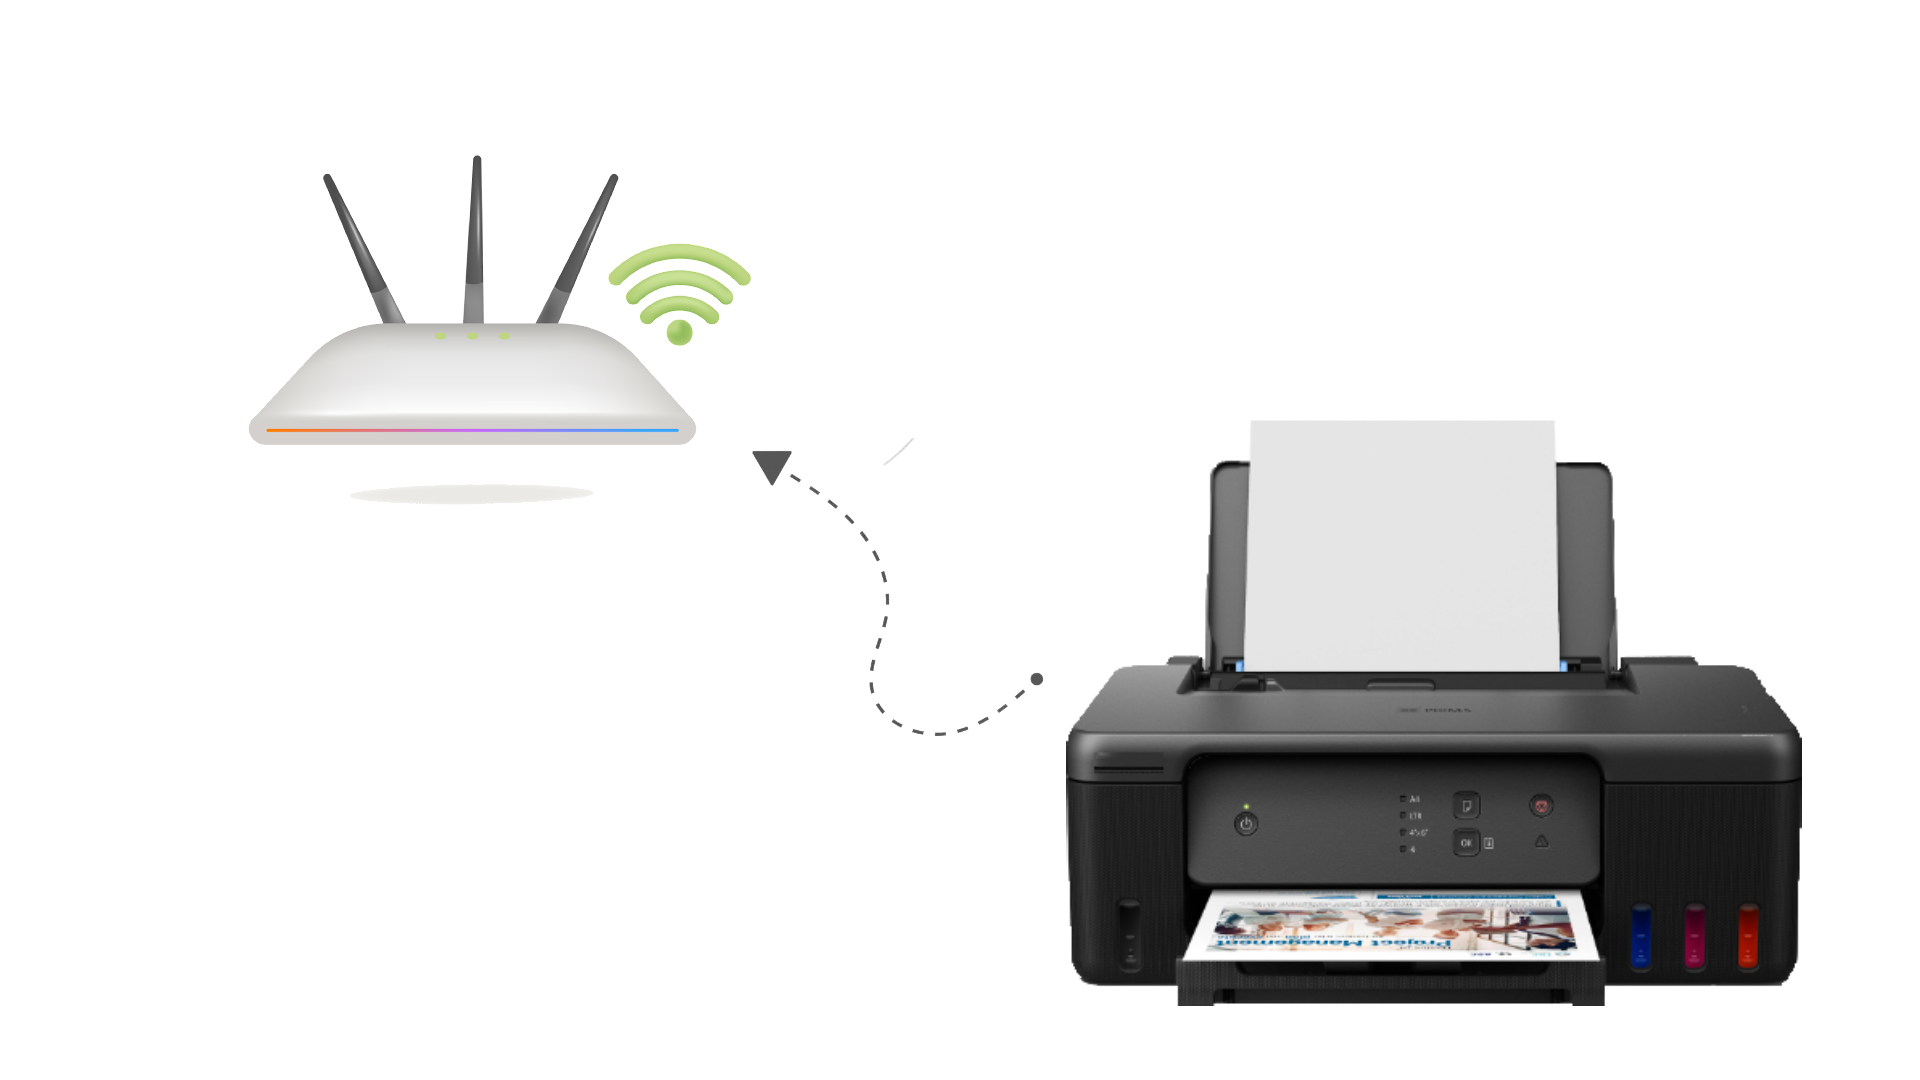
Easy Steps For Canon Printer Wireless Setup
Are you not aware of the key steps for the Canon Printer Wireless Setup? Fret not!! In this section, you will be aware of each and every step that will enable you to achieve success in the whole setup process.
1. Prepare Your Printer
Turn on the Printer:
- In the first step, press the power button so that you can turn on your Canon printer.
Reset Wi-Fi Settings (if needed):
- At the beginning of the process, you have to hold the “Wi-Fi” button on the printer. You need to do it until the power light flashes.
- Now, release the button.
- Finally, the Wi-Fi light will start flashing.
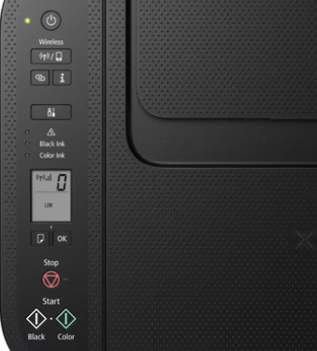
2. Enable Wireless Connection on the Printer
- To enable a Wireless connection on your printer, you have to press and hold the “Wi-Fi” button. Make sure that you are doing this until the blue Wi-Fi light starts flashing.
- Once the light begins flashing, release the button.
- After that, press the “Color” button, then the “Wi-Fi” button again.
Note: The Wi-Fi light ought to flash quickly and indicate that the printer is searching for available networks.
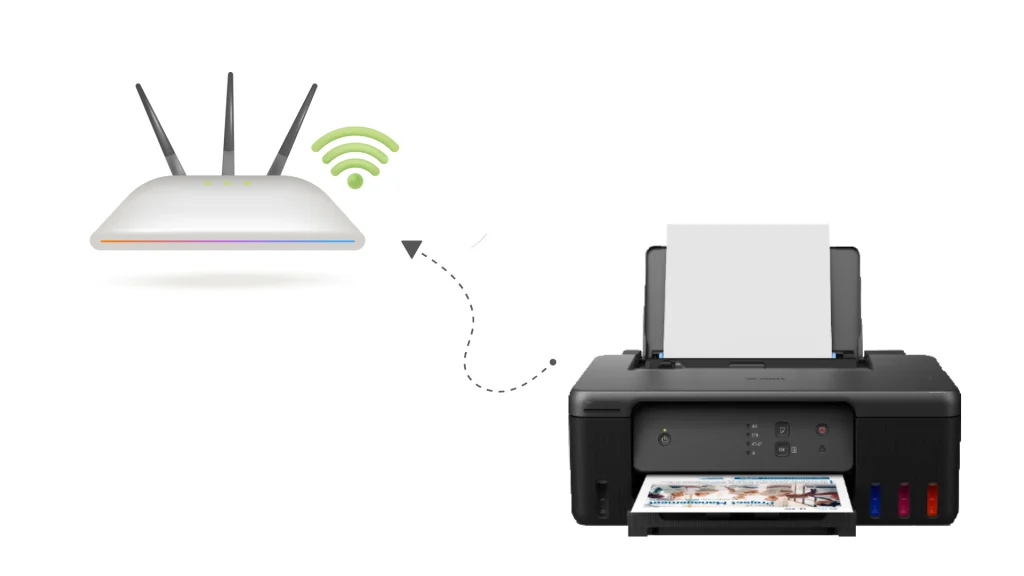
3. Connect Printer to Your Wi-Fi Network
WPS Method:
- At the beginning of the process, press the “WPS” button on your Wi-Fi router.
- In the next step, within 2 minutes, you need to press the Wi-Fi button on your printer.
- Lastly, the blue Wi-Fi light will stop flashing and also stay lit once the connection is successfully established.
Manual Method (if WPS isn’t available):
- Initially, you need to use the control panel of the printer so that you can navigate to the “Wireless Setup” option.
- After that, select your Wi-Fi network from the available list.
- Thereafter, enter your Wi-Fi password when the prompts are shown to you on the screen.
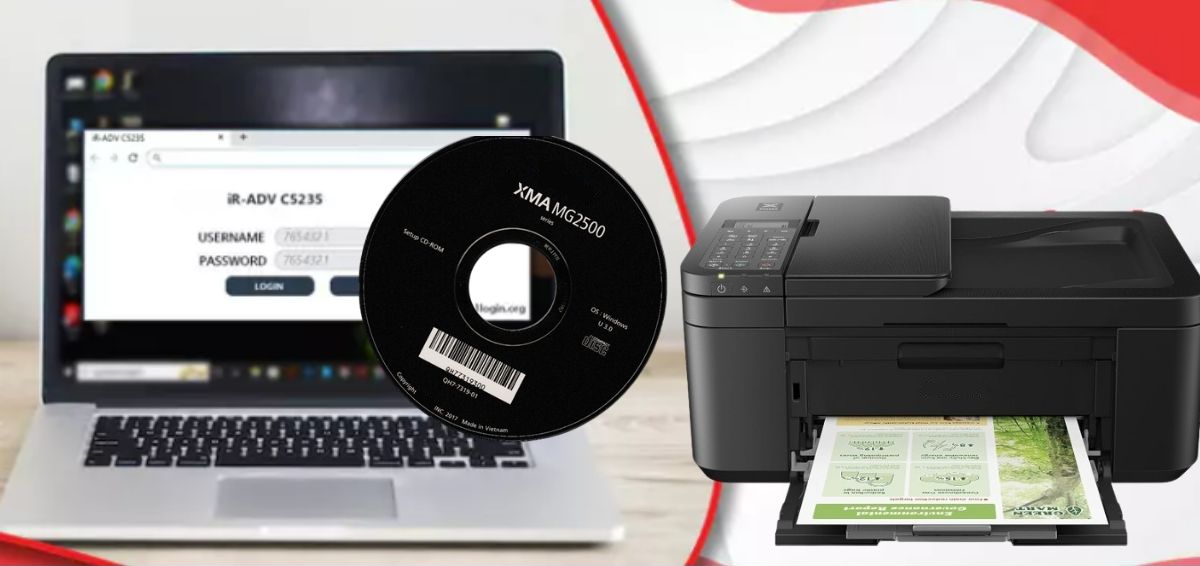
4. Install Canon Printer Drivers
- To kick-start the installation process, you need to visit Canon’s official website.
- Now, you will be able to download the most suitable drivers for your printer model.
- Firstly, navigate to “Support > Drivers & Downloads.”
- Now, enter your printer model.
- In the next step, choose your operating system.
- Last but not least, install the downloaded driver software on your computer or device.

5. Add the Printer to Your Device
On Windows:
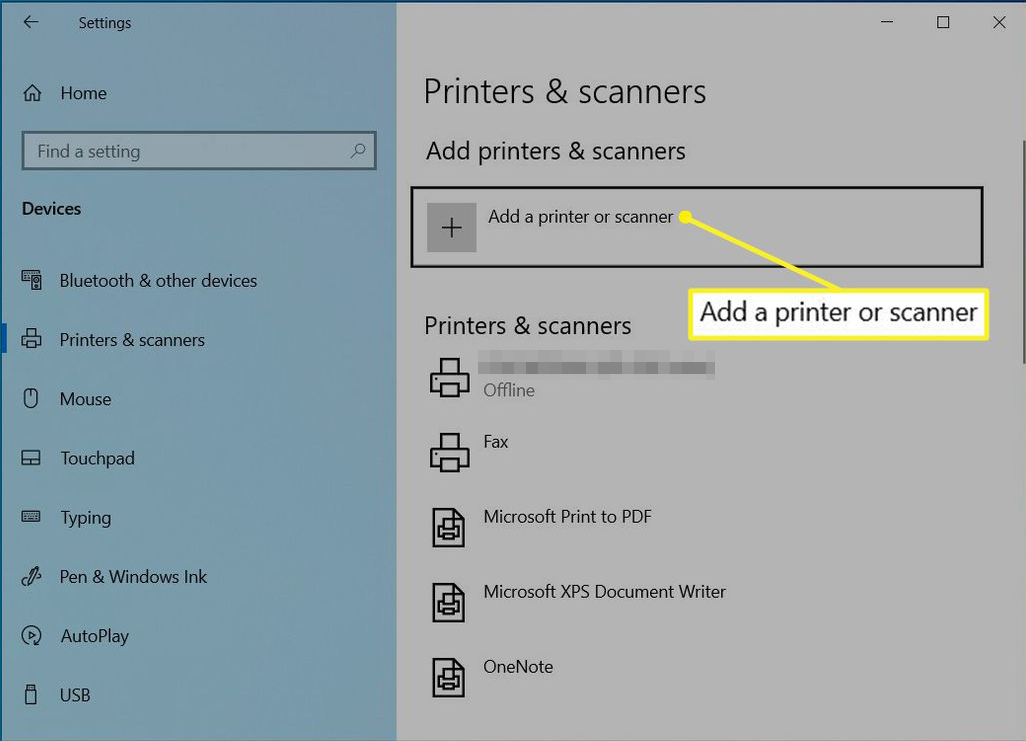
- In the first step, open “Settings > Devices > Printers & Scanners.”
- Later on, click “Add a printer or scanner.”
- Finally, you need to select your Canon printer from the list.
On Mac:
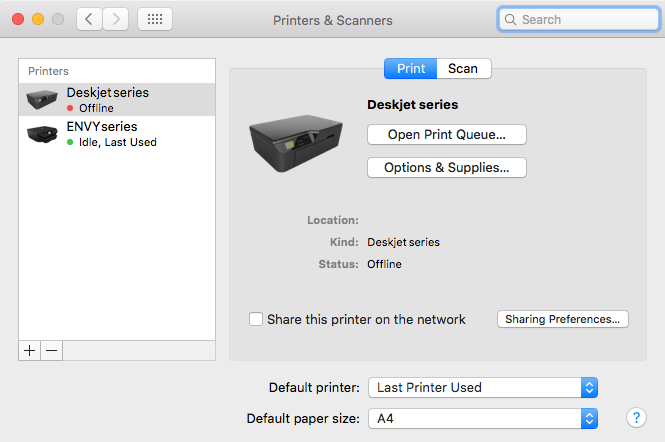
- Now, it’s time to open “System Preferences > Printers & Scanners.”
- In the next step, you have to click the “+” icon and choose your Canon printer.
On Mobile Devices:
- On your mobile phone, download and install the “Canon PRINT Inkjet/SELPHY” app. For this, you have to visit the App Store or Google Play Store.
- Next, use the app so that you can detect and add your printer.
6. Test the Wireless Connection
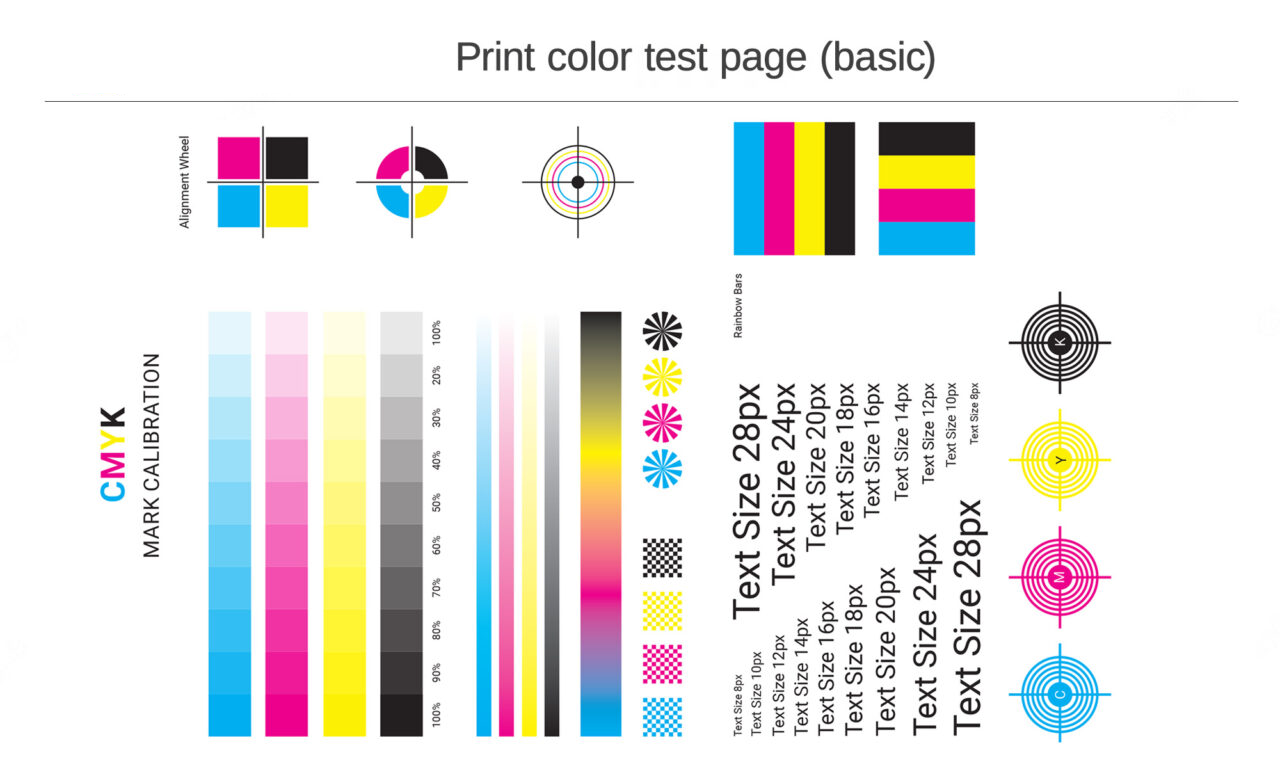
- Finally, you need to print a test page so that you can ensure the printer is properly connected to your wireless network.
- If you find that the test is successful, it clearly indicates that your Canon printer is ready for use!
Canon Printer Wireless Setup Without CD
Don’t you know how to complete the Canon Printer Wireless Setup Without CD? If so, you are in the right place. To help you clear all of your doubts, we have outlined all the steps regarding this process below. So, without much delay, let’s keep an eye on the procedure for the same. Let’s get started!!

1. Prepare Your Printer
Turn On the Printer:
- Initially, you need to press the power button so that you can turn on your Canon printer.
Reset Wi-Fi Settings (if needed):
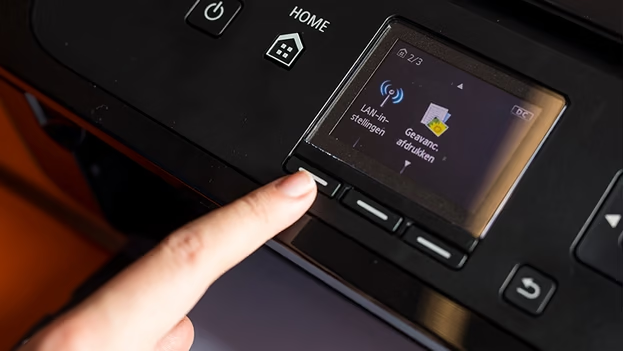
- To kick-start the process of resetting the Wi-Fi settings, locate the “Wi-Fi” button on your device.
- Now, press the button.
- Make sure that you hold the “Wi-Fi” button until the power light flashes.
- After that, release the button. Once you do so the Wi-Fi light will start flashing immediately.
2. Connect Printer to Your Wi-Fi Network
WPS Method:
- Firstly, press and hold the “Wi-Fi” button on the printer. You have to continue it until the blue light starts flashing.
- Now, go to your Wi-Fi router and tap the “WPS” button within 2 minutes.
- Later on, your printing device will automatically connect to your Wi-Fi. The Wi-Fi light on the printer will stay lit when the connection is successful.
Manual Method:
- In this process, you need to use your printer’s control panel. On the other hand, you can also prefer to utilize the display if it is available.
- Now, navigate to “Settings > Wi-Fi Setup > Standard Setup.”
- Thereafter, select your Wi-Fi network from the list. After doing so, you need to enter your password.

3. Download Printer Drivers
Go to the Canon Official Website:
- In the very first step, open your web browser and visit the official “Canon Support” website.
Find Your Printer Model:
- Now, look for your printer model under the “Drivers & Downloads” section.
Download the Driver:
- You have to choose a suitable driver for your operating system. The OS can be Windows, Mac, etc.
- After that, download and install the driver file.
4. Install the Printer Driver
- At the beginning of the installation process, you need to open the downloaded driver file.
- Now, follow all the installation instructions.
- While you are following the steps for setting up your printer, you have to select “Wireless Setup” as the connection type.
- Later on, the installation software will start detecting your printer on the network.
- Finally, the entire configuration procedure will be accomplished.
5. Add Printer to Your Device
On Windows:
- Initially, go to “Settings > Devices > Printers & Scanners.”
- Now, click “Add a printer or scanner.”
- After that, select your Canon printer from the list.
On Mac:
- For your Mac devices, you need to go to “System Preferences > Printers & Scanners.”
- Thereafter, click the “+” button so that you can add your printer.
On Mobile Devices:
- On your mobile device, download the “Canon PRINT Inkjet/SELPHY” app. For this, you need to from the App Store or Google Play Store.
- In the next step, use the app for detecting and adding your printer.
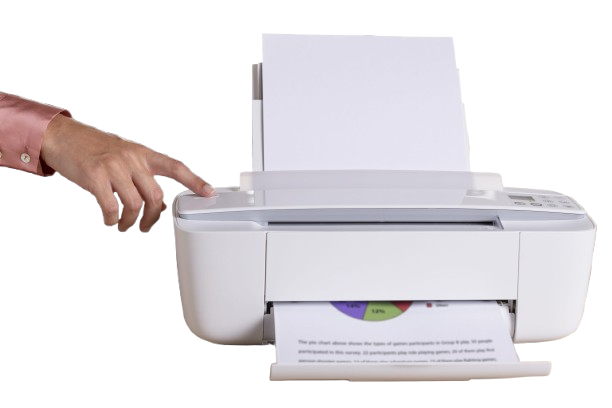
6. Print a Test Page
- To print a test page, you have to open a document or image.
- Once you do it, choose “Print.”
- Thereafter, it will be worth choosing your Canon printer and printing a test page to confirm the setup.
Canon Printer Installation
In the digital world, Canon printers are recognized for their exceptional performance, high-end credibility, and user-friendly features. This is why it is considered a top-notch choice for home and office. Do you have the desire to upgrade your workspace? Or are you willing to add a new device to your home? If so, Canon printer installation is truly a straightforward procedure.
Once you walk through the steps given below, you will surely be able to set up your Canon printer more conveniently. Now, you can confirm that your printer is ready to deliver you top-notch prints from any device. It does not matter that you are a technical expert, once you follow this setup procedure, it will help you to get your printer up and running in no time.
Let’s guide you through the whole installation procedure for your Canon printer.
How to Install CanonPrinter Without CD
If you are not aware of the whole process of installing a Canon printer without using a CD, we have got you covered. Once you take a deep dive into this section, you will be aware of the step-by-step process to install Canon printer without CD. Let’s have an overview of all the steps given below –
1. Prepare Your Printer
Turn on the Printer:
- First of all, you need to press the power button so that you can switch on your Canon printer.
Ensure Proper Setup:
- Initially, insert the ink cartridges.
- Now, load the paper into the tray.
- After that, connect the printer to a power source.
2. Connect the Printer to Your Computer or Network
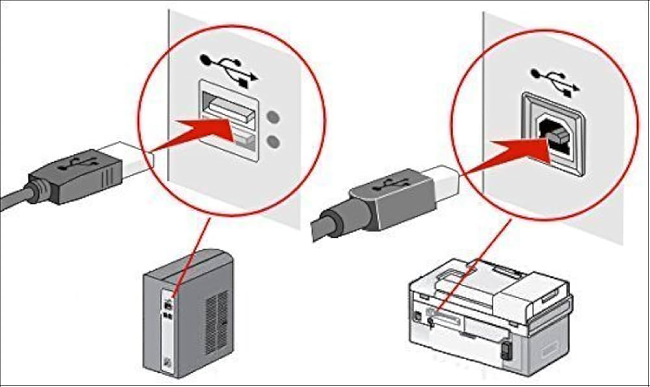
For a USB Connection:
- Firstly, connect the printer to your computer with the use of a USB cable.
For a Wireless Connection:
- In this case, you need to press the “Wi-Fi” button on the printer. You have to do it until the Wi-Fi light starts flashing.
- Later on, use the “WPS” button on your router. You can also manually choose your Wi-Fi network from the printer’s control panel.
- Last but not least, enter your Wi-Fi password when prompted.
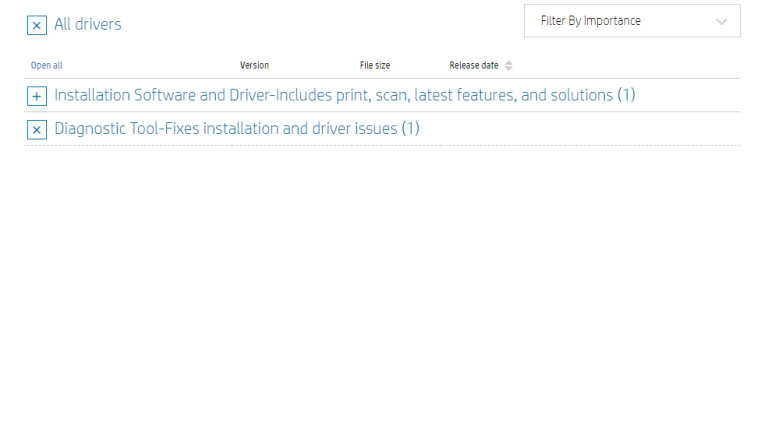
3. Download Printer Drivers
Visit Canon’s Official Website:
- At the beginning of the process, you need to open a web browser. After that, go to Canon support.
Search for Your Printer Model:
- To kick start the process of searching your printer model, you have to enter your printer model in the search bar. Now, navigate to the “Drivers & Downloads” section.
Download the Driver:
- Now, it’s time to choose your operating system. Once you do this, you have to download the appropriate driver and software package.
4. Install the Printer Driver
- For the proper installation of the printer driver, you need to open the downloaded file.
- Now, you can follow the installation prompts.
The steps that you need to follow during the setup process are :
- In the first step, select the “USB Connection” or “Wireless Connection” as per your preference.
- For wireless printers, the software will start detecting your printer if it is properly connected to the same network as your computer.
- Last but not least, you can complete the installation by following the on-screen instructions shown to you.
5. Add the Printer to Your Device
On Windows:
- Initially, go to “Settings > Devices > Printers & Scanners.”
- After that, click “Add a printer or scanner.”
- Now, choose your Canon printer from the list.
On Mac:
- For the Mac operating system, you need to go to “System Preferences > Printers & Scanners.”
- Click the “+” button, so that you can choose your printer, and click “Add.”
6. Print a TEST PAGE
- Finally, it’s time to open a document or image. After that, select the print option.
- In the next step, choose your Canon printer from the list. Later on, you can print a test page so that you can confirm the setup is completed successfully.
Install Canon Printer For Windows 10 and Mac
To help you to be aware of the process to install Canon Printer For Windows 10 and Mac, we have curated this section. In this section, you will be able to accomplish the installation procedure for both your Windows and Mac operating systems more conveniently.
FOR WINDOWS 10
1. Prepare the Printer:
- Turn on the printer.
- Make sure that the printer is properly set up.
- Cross-check that the ink cartridges are installed and the paper is loaded properly.
- Last but not least, connect the printer to your Wi-Fi network for wireless setup. Or you need to use a USB cable for a wired connection.


2. Download the Driver:
- Firstly, visit Canon Support.
- Now, enter your printer model in the search bar.
- Navigate to the “Drivers & Downloads” section.
- After doing so, select your operating system (Windows 10) and download the recommended driver.
3. Install the Driver:
- At the beginning of the installation process, open the downloaded file.
- Now, follow the installation prompts.
- While following the steps for the setup process, you are required to choose the connection type:
For a USB Connection:
- For USB connectivity, you need to plug in the printer when prompted.
For a Wireless Connection:
- In the case of a wireless connection, the software will detect the printer if it is on the same Wi-Fi network as your computer device.
4. Add the Printer to Your System
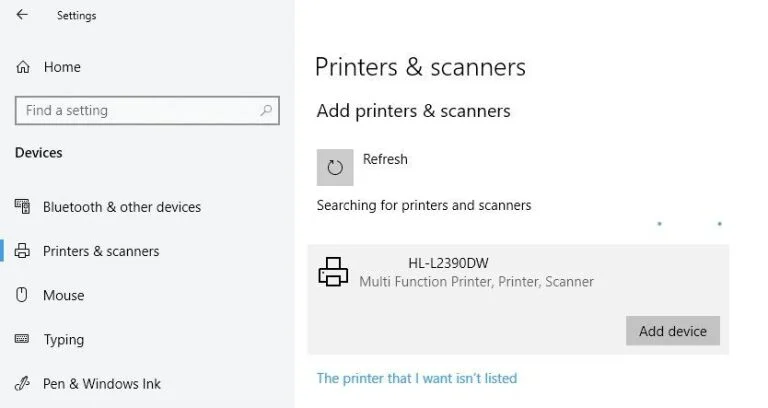
- To add your printer to your OS, you need to go to “Settings > Devices > Printers & Scanners.”
- Now, click “Add a printer or scanner.”
- In the next step, choose your Canon printer from the list.
5. Print a Test Page
- Finally, it’s time to open a document and choose your Canon printer. This way, you can easily print a test page.
FOR MAC
1. Prepare the Printer:
- Just like your Windows OS, turn on the printer.
- Make sure that the printer is set up with ink and paper.
- Now, connect the printer to your Wi-Fi network.
- Additionally, you can also use a USB cable for a wired setup.
2. Download the Driver:
- To download the driver, visit Canon Support.
- In the next step, enter your printer model.
- Later on, navigate to the “Drivers & Downloads” section.
- Finally, you can select your operating system (macOS). After that, you need to download the driver or software package.
3. Install the Driver:
- First of all, open the downloaded file.
- Now, follow the on-screen instructions.
- Thereafter, it is up to you whether you choose the connection type or not:
For a USB Connection:
- Initially, plug in the printer when prompted.
For a Wireless Connection:
- Now, make sure that the printer is connected to the same Wi-Fi network as your Mac.
4. Add the Printer to Your Mac
- In the first step, open “System Preferences > Printers & Scanners.”
- Next,
- click the “+” button to add a new printer.
- Lastly, select your Canon printer from the list and click “Add.”
5. Test the Printer:
- Finally, you have to open a document or image.
- Now, print a test page so that you can ensure that the setup is complete.
FAQ’s
To set up your Canon printer, unbox the printer> install the ink cartridges and paper > turn on the printer > connect your printing device to your computer or Wi-Fi network > Download and install the drivers from Canon’s official website >follow the on-screen instructions to complete the printer configuration > print a test page to confirm the successful setup.
To kick-start the process of setting up your Canon printer wirelessly, all you need to do is – press the Wi-Fi button until the light flashes > press the WPS button on your router > select your Wi-Fi network > enter the password > Download the wireless driver from Canon’s official site and follow the prompts to complete the installation process.
It is easy to find the Canon printer installation software. For this, you have to visit the Canon Support website > go to the Drivers & Downloads section to search your printer model > select the driver that matches your operating system > Download the software > and follow the on-screen instructions for the proper installation of the software on your device.
At the beginning of the process of installing your Canon printer without a CD, you need to visit the Canon Support website > search for your printer model > Download the printer drivers & installation software for your operating system >Run the setup file > choose your connection type (USB or wireless) > follow the instructions to accomplish the installation.