Quick and Effective Steps To Set Up Canon Pixma TS3722
In the age of high-end technology-based devices, the Set Up Canon Pixma TS3722 device has earned a big name. It is known as an efficient and user-friendly wireless all-in-one printer. This device is designed for home and small office use. Undoubtedly, it is supportive of printing, scanning, and copying functions. This is why it has become a versatile choice for all your printing requirements.
Don’t you have any idea about how to set up Canon Pixma TS3722? If not, you have landed on the page. The information mentioned in this blog post will help you to be aware of the step-by-step details. It enables you to walk through the setup procedure more efficiently.
Without wasting even a single minute, you need to go through the process and be familiar with the setup procedure……
How To Set Up Canon Pixma TS3722: All You Need To Know
Are you curious to know the process of setting up Canon Pixma TS3722? Can’t you wait more? If yes, you need to pay full attention to the information mentioned in the post. This way, you will be able to know the key steps involved in the process. So, it is recommended to explore this section thoroughly to know all the details involved in the setup procedure. Let’s move forward……..
Step 1: Unboxing and Preparing the Printer
At the beginning of the set up procedure, you need to make sure that you have all components inside the package. The box ought to include all the essential things mentioned below –
- Canon Pixma TS3722 Printer
- Power Cord
- Black and Color Ink Cartridges
- User Manual and Quick Setup Guide
- Installation CD (For Windows users)
Instructions For You To Follow To Unbox The Package –
- First of all, you need to carefully remove the printer from the box.
- Now, peel off all protective tapes as well as packaging materials from the printer.
- Later on, open the printer’s front cover.
- After that, remove any remaining protective cardboard inside.
- Thereafter, place the printer on a flat, stable surface near a power outlet.
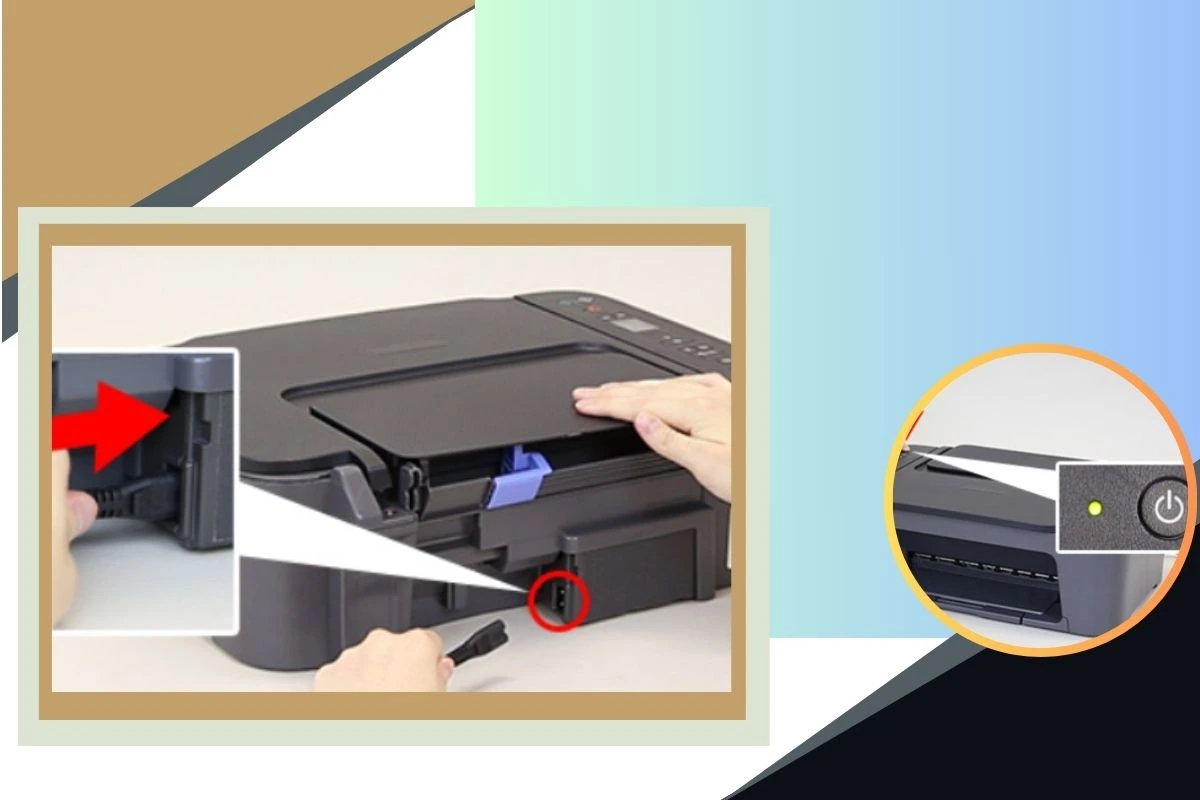
Step 2: Powering On the Printer
Have you completed the process of unboxing your printer? If yes, you need to follow the steps given below to power it on. Let’s have an eye on the steps mentioned here –
- In the first step, connect the power cord to the back of the printer.
- Now, plug the other end into a power outlet.
- Later on, press the Power button on the printer’s control panel.
- Finally, wait for the printer to display a welcome message on the screen.
Step 3: Installing the Ink Cartridges
The Canon Pixma TS3722 needs two ink cartridges. These are namely – Black and Tri-Color (Cyan, Magenta, and Yellow). To install them, the steps that you need to follow include –
- At the beginning of the process, open the front cover of the printer.
- Now, lift the ink cartridge access door.
- Later on, wait for the cartridge holder so that you would be able to move to the center.
- Finally, remove the protective tape from the ink cartridges. (You have to keep this thing in mind that you are not touching the copper contacts).
- In this step, you have to insert the Black ink cartridge into the right slot and the Color cartridge into the left slot.
- Thereafter, push them in gently until they click into place.
- Last but not least, close the ink cartridge door and the front cover.
Step 4: Loading Paper into the Printer
For proper printing, you need to load paper correctly into the input tray. For this, the steps that are required to follow are –
- In the very first step, you need to pull out the paper input tray from the back of the printer.
- Now, adjust the paper guides so that it can match your paper size (A4, Letter, etc.).
- After that, place a stack of plain white paper into the tray.
- Thereafter, ensure the paper is aligned properly and not folded or crumpled.
- Later on, push the tray back into position.
Step 5: Installing Printer Drivers and Software
To make the proper utilization of your printing device on your computer, you have to install the necessary drivers and software. For this, the steps that you need to follow are –
For Windows Users:
- To kick-start the process, insert the installation CD into your computer’s CD drive.
- Now, follow the on-screen instructions so that you can install the required software and drivers.
- Don’t you have a CD drive? If yes, you need to download the latest drivers from the Canon official website.
- Later on, run the downloaded file and follow the installation steps.
For Mac Users:
- Being a Mac user, you have to visit the Canon official website.
- After that, download the Mac-compatible drivers.
- Then, open the downloaded file and run the installation.
- Finally, follow the prompts to complete the setup process.
Step 6: Connecting the Printer to a Computer or Mobile Device
The Canon Pixma TS3722 is supportive of USB and wireless connectivity. It is up to you which one you choose out of these methods to connect your printer.
USB Connection:
- Make the proper utilization of a USB cable to connect the printer to your computer. But you need to keep this thing in mind that it is not always included.
- You need to make sure that the system should automatically detect the printer.
- If prompted, choose Canon Pixma TS3722 as your default printer.
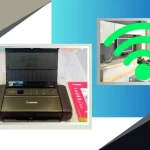
Wireless (Wi-Fi) Connection:
- To kick-start the process, you have to ensure that your Wi-Fi router is working properly.
- On your printer, you need to press the Wireless button until the light starts blinking.
- Now, press the WPS button on your Wi-Fi router within 2 minutes.
- Thereafter, the printer will automatically connect to the network.
- Later on, install the Canon PRINT Inkjet/SELPHY app on your smartphone or tablet.
- Last but not least, open the app and follow the instructions to accomplish the wireless setup.
Step 7: Performing a Test Print
- Once the printer is properly connected, it is significant for you to test its functionality.
- In the first step, open a document or image on your computer or mobile device.
- Now, click Print and select Canon Pixma TS3722 as the printer.
- Later on, adjust the print settings if it is essential for you.
- Click Print and check if the document prints correctly.
Step 8: Setting Up the Scanner
The final step is about setting up the scanner for your printer. The main thing that you need to know is that the Canon Pixma TS3722 has a built-in scanner. Here are the steps that you have to follow for the same….
- Initially, open the scanner lid.
- In this step, place the document face down on the scanner glass.
- After that, close the lid gently.
- Thereafter, on your computer, open the Canon IJ Scan Utility.
- Later on, select Scan type (Document, Photo, etc.).
- In the final step, you are required to click Scan and save the file to your desired location.
Troubleshooting Tips To Resolve Set Up Canon Pixma TS3722 Issues
If you are encountering any kind of issue while setting up your printing device, it is worth going through the reliable tips mentioned below. Let’s go ahead……
- First of all, you need to ensure that the USB cable is properly connected.
- It is better for you to think about restarting both your computer and printer.
- You can also check that the correct drivers are installed.
- Later on, run the printhead cleaning function in printer settings.
- You need to prefer to use only genuine Canon ink cartridges.
- Thereafter, ensure the paper is properly loaded.
- Confirm that the printer and router are within range.
- In this step, restart the Wi-Fi router and try to reconnect once again.
- Finally, reset the printer’s network settings and set it up again.
Bottom line,
By following this detailed guide, you will definitely come to know how to set up Canon Pixma TS3722 more conveniently. Whether you are using a USB or Wi-Fi connection, by setting up the printer, you ensure optimal performance. In addition to this, all troubleshooting tips are mentioned to resolve the common issues correctly. It will be helpful to you to avoid all disruptions.
Typically, this printing device is the best choice for both your home and office printing needs. With the help of this guide, you can now set it up more conveniently. If you face any kind of issues while setting up your device, you can refer to Canon’s support website for more help. Let’s enjoy hassle-free printing!